Paperwork. It's not something most people look forward to. Can't miss that it has the word "work" right in the name. But it can be a lot more interesting (and literally rewarding) if that paperwork leads to getting some of your hard-earned money back in your pocket where it belongs.
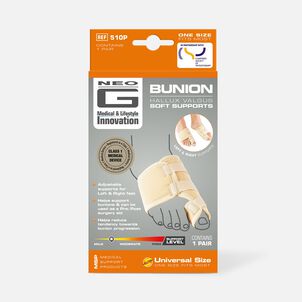
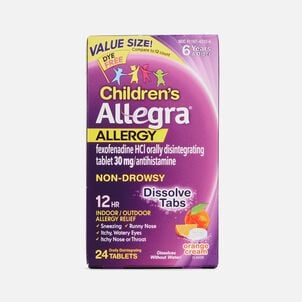
You know, kind of like what happens with your flexible spending account (FSA). You see, even though FSA cards have made it easy to buy eligible health care products tax-free, you've probably bought some things in the last year that qualify for FSA reimbursement. After all, there are so many everyday health products and services like chiropractic appointments, allergy meds and more that you might have bought not knowing they were FSA eligible.
(In other words, your FSA might "owe you one." We all like when that happens.)
But to get this money, you need to make sure your paperwork is in order, and that your receipts and documentation match your claims. It sounds complicated, but it really isn't, as long as you know what you're doing. And that's where this guide to FSA claims and reimbursement comes in.
Over the next few sections, you'll get an everyday person's view on how to handle the organizing and filing of your FSA claims, so the only thing you need to do is sit back and enjoy your tax-free savings. Let's get started…

Gather those receipts!
You won't get far if you don't have receipts for some of the FSA claims you want to make. So whether you're tracking with a spreadsheet or a shoe box, take a few minutes to track down all the items and/or services you want to claim for reimbursement.
Remember, to be accepted for a claim, you’ll need one of the two accepted forms of paperwork: an itemized receipt, or an Explanation of Benefits (EOB) form (which is typically used for eligible medical services). These pieces of paperwork should have the following information:
- Patient Name: The name of the person who received the service or item. (Keep an eye on retail store receipts, which might not have this info
- Provider Name: The provider that delivered the service or where the item was purchased
- Date of Service: The date on which services were provided or the item was purchased
- Type of Service: A detailed description of the service provided or item purchased
- Cost: The amount you paid for the service or product and/or the portion that is not reimbursed through your insurance carrier. Note that if there is a service that was processed through insurance, you'll be looking for your EOB form from your health care provider for this information
Know the Explanation of Benefits (EOB) form
We know, we know… more forms. But this is an easy one. Anything processed through your insurance will require an EOB to show the required items we discussed would be needed for a receipt (provider name, date of service, etc.) to your FSA administrator. The EOB does two things: it will tell you how much was reimbursed from your FSA and the remaining balance, and give you a chance to state your case, and offer up any details needed to prove eligibility. It's not difficult, and it doesn't take much time. And if you haven’t received one in the mail for a particular service you’ve had, you may be able to find it if your health insurance company gives you the option to view EOBs online.
What about itemized receipts?
Even though you might know what a particular receipt is for, it doesn't mean your FSA administrator will have the same understanding. The more info on the receipt, the clearer your request will be, and the easier it will be to get reimbursed. This is a good rule of thumb for any FSA owner.
If your administrator comes back and requests more documentation, don't worry, you'll have a chance to resubmit. Whether that means finding a more-detailed receipt in a shoebox, getting an EOB, or going back to the pharmacy to see if they can pull up a transaction record, there should be a better source of info out there.
Alright, let's file those FSA claims
Before we dive in, let's state one thing — the more frequently you submit FSA claims, the easier it is to stay on top of your reimbursements throughout the plan year. Not only will you get the money faster (obviously) but it also serves as a good way to stay aware of your available FSA funds.
Our suggestion? Make it a regular habit — either on a weekly basis, or even as soon as you make a purchase or receive an EOB, so you're always right on top of your available balance (a hearty spreadsheet saved to the cloud so you can access it anytime would be a good start).
When it comes to starting the filing process, your FSA administrator will usually have a specific way they want to receive claims. Some FSA administrators let you submit claims online, while others offer a form to complete. With most of the world moving these transactions online, there's a good chance you can submit this way for all expenses. But "most" doesn't mean "all" so be ready for some light paperwork if needed.
A quick refresher on dependents:
- An eligible dependent is defined as a spouse, qualifying child or qualifying relative. For an FSA, this includes your adult children through the age of 26
- A qualifying relative is an adult dependent whom you can claim on your tax return
- A letter of medical necessity is required for any expense listed as such on our Eligibility List (and potentially others if your FSA administrator requires it). Basically, even if you think you need it, it won't be eligible unless deemed medically necessary by a licensed physician
- EOBs are recommended, in case your insurance covered a portion of the expense
Finally, be sure that your receipts and EOBs match the totals accurately, so there's no problems after you've sent the forms along. A little extra diligence now can save you a ton of hassle later. Which is really the theme of this whole guide.
Keep in mind, this is an overview — your FSA administrator likely has a preferred way to file claims, so be sure to check with them before proceeding. But once it's done and submitted, sit back and relax - your FSA administrator can take it from here.
How will you get your FSA reimbursement?
Most FSA providers offer direct deposit for reimbursed funds, but others will issue paper checks. Typically (especially if you submitted online) these claims are processed quickly — often within a few days of submission — so you likely won't be without your money for very long.
Some FSA administrators even offer the option to pay your provider directly, so if you have outstanding owed expenses and an EOB to match, you may be able to have your FSA admin send the check directly to your health care provider for you.
Most FSA administrators have this process down to a science, and have made even the most-complicated FSA claims submissions an easy process, thanks to platforms, apps, user-friendly websites and clear language about eligibility guidelines. In other words, they empower you, the user, to maximize these accounts with as little effort as possible, so you can make the most of these fantastic benefits.
What if my FSA claim is denied?
We're glad you asked. It's never fun to deal with more paperwork, but sometimes a lack of clarity around an expense can lead to your claim being denied. Still, you shouldn't panic or give up — sometimes there's a simple fix that can allow you to refile the claim and get reimbursed. It doesn't mean you've done anything wrong and there's a good chance it's not even your fault.
There are a lot of reasons your FSA claim might be denied and most have an easy fix. Here are just a few of the most common causes.
Less remaining funds than expected
Sometimes it's hard to keep track of these expenses, and that can affect your FSA balance. If your claim is denied, it might be because you had insufficient funds in your account or that the price of the item you tried to purchase is higher than your available balance. Be sure to regularly monitor your available FSA balance whenever making a purchase, so you don't overextend your benefit.
Items aren't FSA eligible
While the IRS determines which items are FSA eligible, employers can set their own eligibility rules as long as they are within IRS guidelines. In other words, it's important to check in with your FSA administrator and confirm that the item you want to buy is eligible for tax-free spending.
If your FSA card was declined but you decided to buy the item with a different card, then it's still a good idea to try and get reimbursed through your FSA. Of course, this is the perfect moment for a shameless plug — if you bought the item through FSAstore.com and the item was allowed under your plan guidelines, we guarantee that the item is FSA eligible (as long as you're using your plan properly- remember how we said employers can set their own eligibility rules earlier), so be sure to save your receipt and submit for reimbursement.
Your receipts don't match
If you submitted the wrong documentation, contact your FSA provider right away and see if you can resubmit. It's as simple as that. However, if you make a purchase and don't have a matching receipt, you may be able to substitute one from another qualified transaction.
Let's say you purchased sunscreen and realized you don't have the receipt. Instead, you may be able to find another receipt for a qualified purchase to offset your original purchase. Maybe you buy additional sunscreen at a different store and submit that receipt, instead. As long as the prices match or you have a qualifying receipt for an amount of at least the amount you are requesting to be reimbursed for, you should be okay.
In some cases you may not even need to submit a receipt, although we always advise that you keep them just in case. For example, if you used your FSA debit card to make a payment and at a qualified merchant for certain eligible over the counter products, your expense may even be automatically approved without the need for documentation. (Shameless plug here, too, because everything we carry at FSA Store is eligible!)
Are there any other FSA claims mistakes I need to watch for?
Mistakes are normal, and they aren't the end of the world. But when you make a mistake with your FSA claims, you need to be able to fix them as soon as possible, so you're not caught paying for them later. In other words, you want to be sure that you're using your FSA correctly so that you're not required to pay your reimbursements back or stuck with money you can't realistically use.
Here are a few common errors that could lead to bigger issues, if you're not careful.
Double expensing
One common mistake is paying for an FSA eligible expense with your FSA card, and then submitting the same expense for reimbursement. Most benefits administrators can catch these mistakes pretty quickly.
But if a claim does go through and you get reimbursed twice for the same expense, you'll have to pay it back to your administrator if (and let's be real... when) they become aware of the issue.
Claiming through separate accounts
Let's say you and your spouse each have FSAs through your respective employers. If you pay for a copayment or FSA eligible product and submit a claim for that expense under both accounts, this is another clear example of double dipping.
Get ahead of this — keep your claims separate for each account to avoid problems down the line.
Wrapping up…
Paperwork might not be the most-exciting thing to discuss … well… ever. But when it comes to eligible items and services you might have purchased during your plan year, the paperwork can result in some big savings. After all, it's your money — a little legwork can mean a lot more of it in your wallet, and less of it lost due to forfeiture or denied claims.
Using the tips here, some diligent record-keeping with receipts, and a conversation (or two) with your FSA administrator, filing FSA claims and receiving reimbursement can be an easy, effortless process for making the most of your tax-free funds.
-
Thank you for visiting the FSA Store Learning Center! Don’t forget to follow us for more helpful tips on Facebook, Instagram, and Twitter!
